Painting Tutorial: Rust & Weathering
/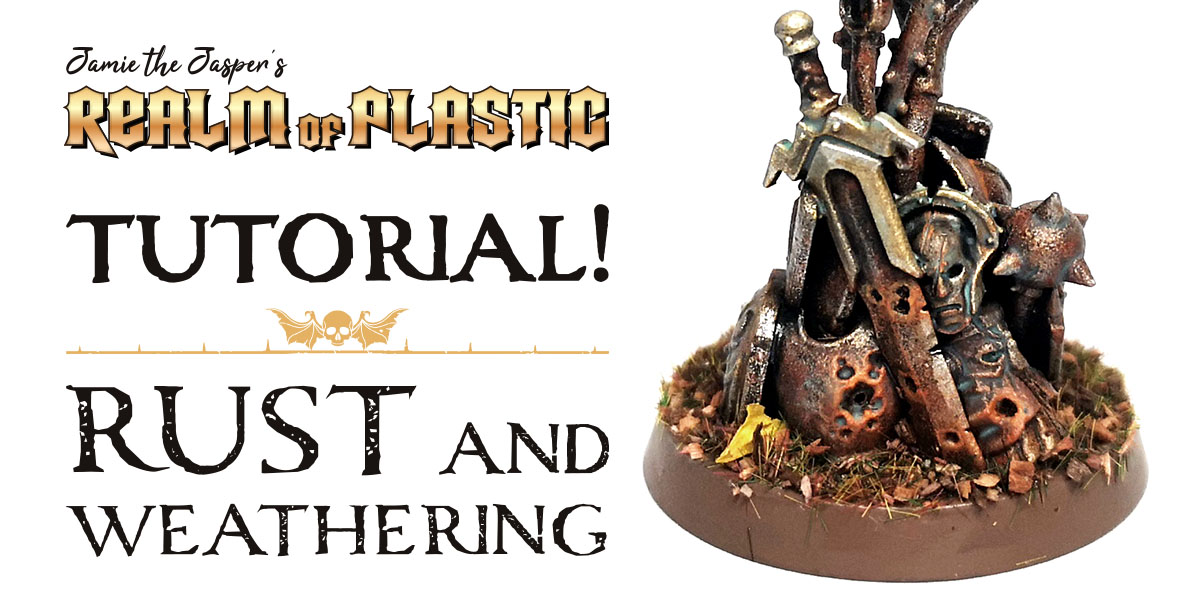
In which Jamie shows you how to make your metal surfaces look like they’ve been ravaged by time and the elements harder than Slaanesh ravaged your… never mind.
This tutorial covers rust and weathering effects for iron, steel and gold all wrapped up into a single process. It’s great for armour, weapons, chains, metal constructs, chariots and a whole host of other things. Just remember, this is an Age of Sigmar blog, so using this tutorial to paint vehicles and such for Warhammer 40,000 is absolutely forbidden. Your paintbrush will explode.
This technique is a bit messy, so it works best when you plan to apply it to the majority of the surfaces on the miniature - Ironjawz armour, a Kharadron Ironclad, that sort of thing. You can then tidy up the remaining non-metallic areas when you’re done with this process. I’ll be demonstrating using an objective marker that I made using various weapons, shields and bits of armour I had lying around.
Citadel Paints Used:
Rhinox Hide
Mournfang Brown
Wild Rider Red
Fire Dragon Bright
Zandri Dust
Agrax Earthshade
Ironbreaker
Retributor Armour
Liberator Gold
Ryza Rust
Nihilakh Oxide
Lahmian Medium
Click on any picture below to enlarge the image.

Step 1
Start off by priming your model black. Then basecoat the whole miniature with two two thin layers of Rhinox Hide. Easy.
Step 2
We begin by laying down the rusty foundations of the iron and steel areas.
Heavily stipple the entire model with Mournfang Brown. Stippling is when you gently jab at the surface of the miniature at a 90-degree angle using a drybrush. The amount of paint on the brush should be a little less than you would use for layering, but more than you would use for drybrushing. You don’t want to deposit big blobs of paint, but you also want the markings to be less subtle than a drybrush.
Step 3
Stipple the model again, this time with Wild Rider Red. At this point you should start being just a little more particular about where you’re applying the paint. Start to narrow down the application to a few specific areas where you want the rust effect to be more pronounced. We’re going to be narrowing these areas down further in subsequent steps.
Step 4
Again! Stipple it again! But use Fire Dragon Bright this time. And focus the area of application down just a little more.
Step 5
Thought you were done with stippling? Wrong! Again! Now use Zandri Dust. Focus the area of application a little more. Your stippling adventure is now over.
At this point, if you have any areas on the model that aren’t metal, but which you still want to look grimy and weathered, paint those up. Usually this will be things like armoured plates. For example, at this stage I painted the Stormcast shield on this objective marker blue (scroll to the end to see it).
Step 6
Apply a wash of Agrax Earthshade to the whole model. Don’t let it pool too much. The purpose of this wash isn’t just to create shading. It’s also to blend all of the colours together a little and also knock back the brightness a bit. You can apply a second wash of Agrax Earthshade if it’s still looking a little too bright.
At this point the model will look like it’s been rusting away for the last 100,000 years, which is a bit extreme. In the next steps we’ll bring the metallic look back into play.
Step 7
Heavily drybrush all the metal areas of the model using your preferred iron and steel paints. In this example I’ve used Ironbreaker.
At this point, if there are any gold or brass details you should paint those up using your preferred recipe. In this example I used Retributor Armour followed by an Agrax Earthshade Wash, then Liberator Gold and a highlight of Ironbreaker.
Step 8
Carefully drybrush only the most heavily corroded iron and steel areas with Ryza Rust. Next, because rust has a tendency to break out in recessed areas, create a 1:2 mix of Fire Dragon Bright and Lahmian Medium - apply this to the recesses of the iron and steel areas. Apply multiple coats if you’d like it to be a little brighter. I’d recommend being somewhat selective about which recesses you apply this too, and applying it to everything can look a bit over the top and unrealistic.
Then very carefully apply a 50:50 mix of Nihilakh Oxide and Lahmian Medium to the recesses of any brass or copper areas to create a verdigris effect.
Now, some people will tell you that verdigris shouldn’t be applied to steel, iron and gold because these metal don’t oxidize in this way. That’s a matter of personal taste. I say if it looks good, do it. So in this example, I’ve applied the verdigris mix primarily to the gold areas, but also very sparingly to a few other areas too. I really love the striking contrast between the green verdigris and the orange rust.
If this tutorial has inspired you to paint up your own objective markers, why not order some from Firestorm Games with a substantial discount on the recommended retail price. They also stock all the paints and brushes used in the tutorial. Ordering from Firestorm Games via this link helps keep the light of Azyr shining on the Realm of Plastic.
Please take a moment to hit ‘like’ below, share this article or just leave a comment to say ‘Hi!’. It would mean a lot to me. Thanks for reading!